
Cooking morel mushrooms requires thorough cleaning and high-heat sautéing to bring out their rich, earthy flavor and meaty texture. The process takes about 20 minutes from start to finish, but cleaning demands patience because these honeycomb-capped mushrooms trap dirt, sand, and occasionally small insects in their crevices. Once properly prepared, morels transform into one of spring’s most prized ingredients, their nutty, woodsy taste elevating simple dishes into something memorable.
These wild mushrooms appear briefly each spring, making them a seasonal treasure worth learning to prepare correctly. Unlike cultivated button mushrooms that you can simply wipe clean, morels need a proper soak and rinse to remove hidden debris without turning them waterlogged and soggy. The key is working quickly and cooking them soon after cleaning.
What makes morels special goes beyond their fleeting availability. Their distinctive flavor pairs beautifully with butter, cream, fresh herbs, and even unexpected partners like a drizzle of maple syrup for a sweet-savory glaze. Whether you’ve foraged your own basket or splurged at the farmers market, mastering the cleaning and cooking technique ensures you make the most of every cap. This guide walks you through inspecting, cleaning, and cooking morels using methods that preserve their unique character while making them safe and delicious to eat.
What Makes Morel Mushrooms Special
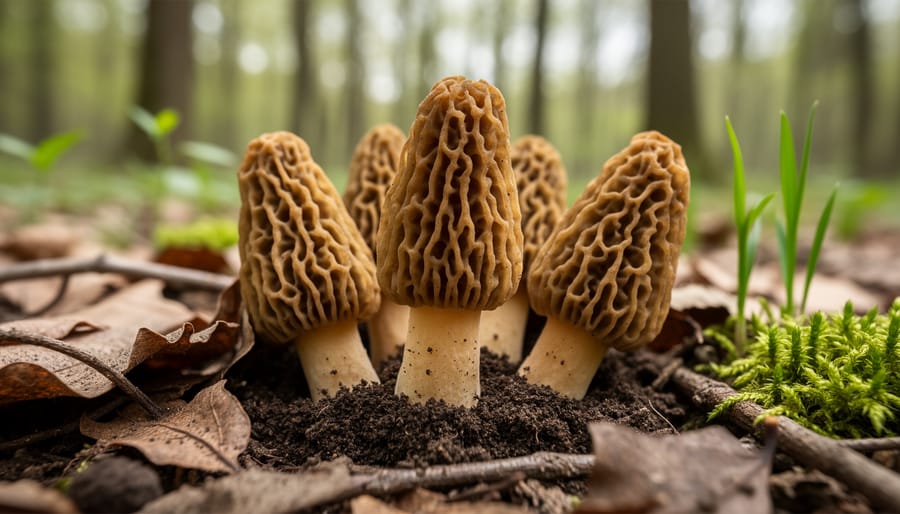
Morels stand apart from other wild mushrooms because of their remarkable flavor, their fleeting availability, and their status as a true seasonal treasure. These distinctive honeycomb-capped fungi appear for only a few weeks each spring, making them one of nature’s most anticipated delicacies. When conditions align, typically after the first warm rains, morel hunters race to find them before the brief season ends.
Their culinary reputation is well-earned. Morels deliver a deep, earthy flavor with nutty undertones that intensifies when cooked, a taste profile you won’t find in cultivated mushrooms. This distinction doesn’t go unnoticed: some chefs will pay local hunters $20-30 per pound for fresh morels, reflecting both their rarity and their ability to elevate a dish from ordinary to memorable.
What truly sets morels apart is that they can’t be commercially cultivated on any meaningful scale. Unlike button mushrooms or portobellos that grow year-round in controlled environments, morels form mysterious relationships with specific trees and soil conditions that resist replication. You have to find them in the wild, which means foraging skills, knowledge of the right habitat, and good timing all matter. That combination of scarcity, flavor, and the thrill of the hunt makes cooking with morels feel less like a routine meal and more like working with something genuinely special.
Tools and Materials You’ll Need
You don’t need much to turn wild morels into a memorable meal, but having the right tools makes the process smoother and helps preserve these delicate mushrooms. Most of what you need is already in your kitchen, with just one item specifically for foraging.
Gathering and Preparation Supplies:
- Mesh bag for collecting morels in the field, which allows spores to drop and begins the cleaning process
- Tweezers or a toothpick for removing slugs from the tight folds and crevices
- Two or three bowls for rinsing and inspecting your haul
- Clean kitchen towels or paper towels for thorough drying
- Sharp knife for trimming stems and slicing morels lengthwise
- Cast iron or stainless steel skillet for sautéing with dry heat
The mesh bag is the only specialized piece of equipment. Unlike plastic bags or paper sacks, mesh lets dirt and debris fall through while you walk, giving you a head start on cleaning. For everything else, standard kitchen gear works perfectly fine. A good knife matters because morels need clean cuts rather than ragged tears, and a heavy skillet holds heat well for the dry-heat cooking method that brings out their nutty flavor.
Safety and Identification Considerations
This guide focuses on cooking technique, not mushroom identification. Before you ever reach the kitchen, you must be absolutely certain you’ve harvested true morels. False morels exist and can cause serious illness, so correct identification isn’t optional.
If you’re new to foraging, go out with an experienced mushroom hunter who knows the local species. Their hands-on guidance will teach you what field guides can’t fully capture about texture, smell, and subtle differences between species. Many regions have mycological societies that organize group forages during spring morel season, offering ideal learning opportunities for beginners.
Invest in reliable field guides specific to your region, and cross-reference multiple sources when identifying your finds. Look for guides with clear photographs showing true morels from various angles, alongside images of look-alikes. Pay attention to the hollow interior that distinguishes true morels from potentially harmful false varieties.
Once you’ve built confidence through mentorship and study, you’ll recognize true morels by their distinctive honeycomb caps and completely hollow stems and caps. Until then, verify every mushroom before it goes in your collecting bag. The effort you put into learning proper identification will reward you with years of safe, delicious morel harvests.
Step-by-Step: Preparing and Cooking Morels
Step 1: Collecting Morels Properly
Using a mesh bag for collection isn’t just convenient, it’s the first step in cleaning your morels. As you walk through the woods, the open weave lets spores fall back to the forest floor, helping future morel crops, while the constant movement and airflow shake loose surface debris, dirt, and the occasional hitchhiking bug. By the time you return home, your morels have already been jostled clean of loose particles that would otherwise complicate your prep work. Plastic bags trap moisture and create a breeding ground for decay, but mesh keeps your haul dry and breathing. You’ll find that morels collected this way need far less intensive cleaning at the sink, saving you time and preserving these delicate mushrooms in better condition for cooking.
Step 2: Inspecting for Unwanted Guests
After gathering your morels in a mesh bag, the next critical step is a thorough inspection. Morels have a distinctive honeycomb structure with deep pits and ridges that create perfect hiding spots for unwelcome hitchhikers. You’ll often find dirt packed into these crevices, along with tiny insects and sometimes slugs that have wedged themselves into the folds.
Hold each mushroom up to good light and examine it carefully, turning it to check all sides. The interior chambers can harbor debris that won’t come out with a simple rinse. Slugs present a particular challenge because they can tuck themselves deep into the honeycomb pattern, sometimes matching the mushroom’s color closely enough to blend in.
For removal, you have several options depending on what you’re dealing with. Your finger works well for dislodging larger debris and slugs that are easily accessible. A pair of tweezers gives you precision for smaller bugs or slugs wedged into tight spots. A toothpick is helpful for teasing out dirt from the deepest pits without damaging the delicate mushroom tissue.
Take your time with this step. It might feel tedious, but finding a slug after cooking is far worse than spending an extra few minutes now.
Step 3: Rinsing Your Morels
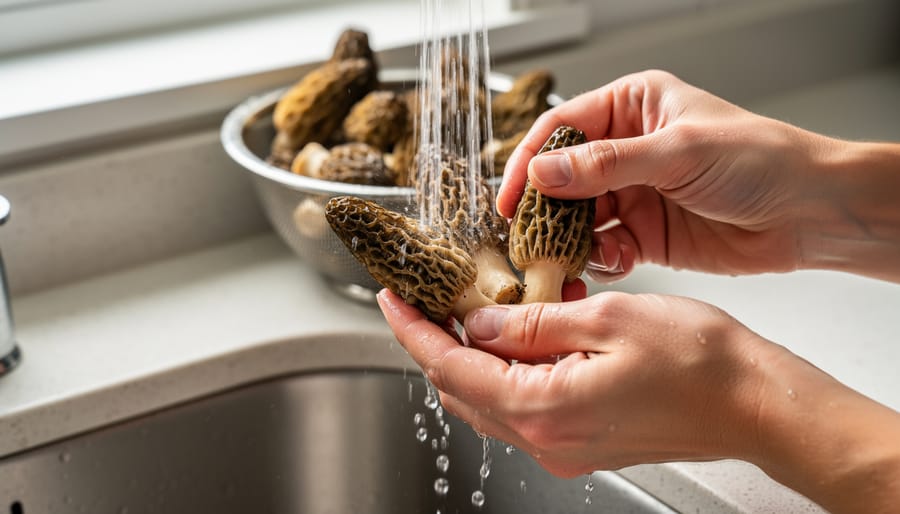
Once you’ve inspected your morels, it’s time to give them a proper rinse. Fill a bowl with cool water and gently swish the mushrooms around to dislodge any remaining dirt or tiny bugs hiding in the crevices. Some foragers debate whether morels should be washed at all, the purists prefer dry brushing to preserve texture, but if you’ve found slugs or significant dirt during inspection, rinsing becomes practical rather than optional.
The key is not to soak them. Morels are porous and will absorb water like a sponge if left sitting in a bowl. Instead, give them a quick rinse, maybe two passes through clean water if needed, then lift them out immediately. You can rinse them individually under running water if you prefer more control, paying attention to the folds and honeycomb structure where debris tends to cling.
After rinsing, shake off excess water and move directly to the drying step. The goal is clean mushrooms without waterlogged ones, since moisture interferes with proper cooking later.
Step 4: Drying Thoroughly
Water is morel’s worst enemy in the pan. Wet mushrooms steam instead of sear, turning rubbery and releasing their earthy flavor into the cooking liquid rather than concentrating it. After rinsing, spread your morels on clean kitchen towels or paper towels in a single layer. Pat them gently but thoroughly, getting into the honeycomb pits where water pools. Let them air-dry for 15 to 30 minutes if you have time, turning them once or twice. The surfaces should feel dry to the touch before they hit the heat. For long-term storage, you can dry until brittle using a dehydrator, but for same-day cooking, proper towel-drying is enough to ensure a proper sear and that nutty, caramelized finish you want.
Step 5: Trimming and Slicing
Once your morels are clean and dry, trimming and slicing them properly sets you up for success in the pan. Start by examining the stem end of each mushroom, if it looks dried out, dirty, or damaged from your collection knife, trim off just the very bottom with a sharp blade. You don’t need to remove much; morel stems are completely edible and delicious.
Next, slice each morel in half lengthwise from cap to stem. This serves two purposes: it gives you one final chance to inspect the interior chambers for any lingering dirt or tiny hitchhikers you missed during rinsing, and it creates flat surfaces that will make contact with your cooking surface. Those flat sides are where you’ll get the best browning and texture. For smaller morels, you can leave them whole after checking the interior, but larger specimens cook more evenly when halved or even quartered.
Step 6: Cooking with Dry Heat
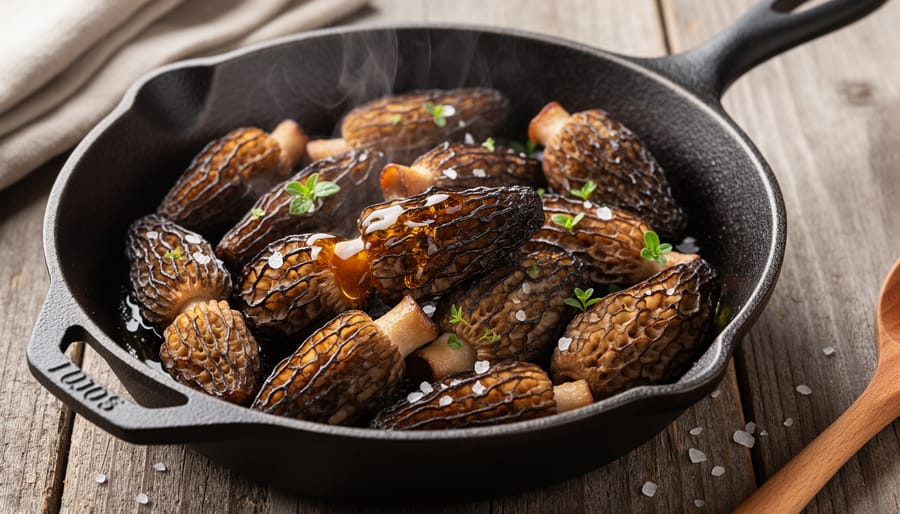
Dry heat brings out morel mushrooms’ nutty, earthy flavor while creating the crisp, golden exterior that makes them irresistible. After you’ve thoroughly dried your morels, heat a skillet over medium-high heat and add butter or oil. Once it’s shimmering, add your morels cut-side down in a single layer, giving them space so they sear rather than steam.
The key is patience. Let them sit undisturbed until the edges turn golden brown and the moisture evaporates. You’ll hear the sizzling change pitch as the water cooks off and the browning begins. Resist the urge to stir too often, moving them constantly prevents that caramelized crust from forming.
Butter works beautifully with morels, adding richness that complements their woodsy taste. Some cooks prefer a neutral oil for higher heat, then finish with butter and fresh herbs. Either way, the morels should develop deep brown patches and shrink slightly as their moisture releases.
You’ll know they’re ready when they’ve lost their raw, spongy texture and feel tender when pierced with a fork. The aroma shifts from earthy and raw to toasted and almost nutty. Season with salt and pepper toward the end of cooking, salting too early draws out moisture you want to evaporate first. This simple approach lets the morels’ unique flavor take center stage.
Creative Ways to Enjoy Your Cooked Morels
Once you’ve carefully prepared your morels, you get to explore the fun part: bringing them to the table. These earthy, nutty mushrooms shine in simple preparations that let their flavor come through.
Serving suggestions and pairing ideas:
- Toss warm morels with fresh pasta, cream, and a drizzle of aged Parmesan
- Layer them into a spring frittata with asparagus and fresh herbs
- Pile them on toasted sourdough with a smear of goat cheese
- Fold them into risotto with peas and a splash of white wine
- Serve alongside pan-seared steak or roasted chicken as an elegant side
- Add to omelets or scrambled eggs for a luxurious breakfast
Here’s where things get interesting: you can pair maple with morels to bring out their natural sweetness while balancing the earthiness. A light glaze of maple syrup in the final moments of sautéing creates a subtle caramelization that complements the mushrooms without overpowering them. If you’re curious about other savory maple pairings morels fit beautifully into that tradition of using natural sweeteners to elevate springtime ingredients.
Consider building a full seasonal meal around your foraged find. Start with morels as the star of your main course, then finish with maple dessert to carry that artisanal, ingredient-focused theme through to the end of dinner.
Verification: How to Know Your Morels Are Ready
Knowing your morels are ready involves checking them at two stages: after cleaning and after cooking.
During the inspection and cleaning phase, you’ll verify readiness by examining the mushroom’s crevices. Turn each morel over, look into every fold and hollow, and check that you’ve removed all visible dirt, debris, and any slugs or bugs. The honeycomb structure should look clean throughout. After rinsing, squeeze gently to see if any remaining grit or tiny insects wash out. When water runs clear and you see no movement or particles, your morels are clean.
For cooked morels, rely on visual and textural cues rather than a timer. Properly cooked morels develop golden-brown edges and a slightly crispy exterior while the interior becomes tender. They’ll release their moisture first, then that liquid will evaporate as they continue cooking. You’ll notice a deep, earthy aroma becoming more pronounced. The texture should feel firm but tender when you press with a spatula, not spongy or rubbery. Pale, wet-looking morels need more time, while darkly browned ones have gone too far. Trust your senses: the mushrooms will tell you when they’ve transformed from raw forest find to ready-for-the-table delicacy.
Frequently Asked Questions
Should I wash or dry brush morel mushrooms?
Rinsing is recommended to remove loose dirt and bugs from the nooks and crannies where they hide. While some foragers prefer dry brushing to avoid waterlogging, a quick rinse followed by thorough drying works well for most home cooks.
How should I store fresh morels before cooking?
Keep them in a paper bag in the refrigerator, never in plastic, which traps moisture and causes them to deteriorate quickly. Use them within a few days of foraging for the best flavor and texture.
Are morel stems edible?
Yes, the entire mushroom is edible once properly cleaned and cooked. You can trim any dried or damaged parts from the bottom, but the stems have the same earthy flavor as the caps.
Why is dry heat preferred for cooking morels?
Starting with dry heat in a hot pan allows morels to release their moisture gradually and develop a golden, slightly crispy exterior. This method concentrates their nutty, earthy flavor instead of steaming them.
When you’re ready to experiment with flavor combinations, consider pairing your cooked morels with ingredients that complement their woodsy notes. A drizzle of aged balsamic or a touch of cream can enhance their natural richness, and if you enjoy creative pairings with artisanal ingredients, you might explore how to store maple syrup properly so you always have some on hand for savory applications. The subtle sweetness of maple works surprisingly well in morel dishes, particularly when balanced with butter and fresh herbs. Fresh morels are only available for those few weeks in spring, so taking the time to prepare them correctly ensures you make the most of this brief seasonal window.
Cooking with morel mushrooms is one of spring’s most rewarding culinary adventures. From the moment you spot those distinctive honeycombed caps in the forest to the final bite of a perfectly sautéed mushroom, the entire process connects you to the season in a way few ingredients can. Yes, the preparation takes care and patience, inspecting each crevice, removing the occasional slug, ensuring they’re completely dry, but that attention to detail is part of what makes the result so satisfying.
This hands-on approach to artisanal food production, working with what nature provides during its brief window of availability, embodies a kind of culinary craftsmanship that’s increasingly rare. You’re not just cooking; you’re participating in a seasonal tradition, handling an ingredient that foragers and chefs prize for its fleeting presence and remarkable flavor.
If you’ve never cooked with wild morels, this spring is the perfect time to start. The effort you invest in proper preparation will be rewarded at the table, and you’ll gain a deeper appreciation for these forest treasures that appear for just a few precious weeks each year.